> ## Documentation Index
> Fetch the complete documentation index at: https://docs.akta.pro/llms.txt
> Use this file to discover all available pages before exploring further.
# Webhooks
> Set up a webhook to receive real-time event notifications at your endpoint URL
## Overview
Webhooks let you receive real-time notifications whenever specific events occur in your account, such as when a requested company is added and becomes available. This guide walks you through creating and configuring a webhook.
## Step 1: Navigate to Webhooks
Go to [playground.akta.pro](https://playground.akta.pro) and log in to your account.
From the left navigation bar, click **Webhooks**.
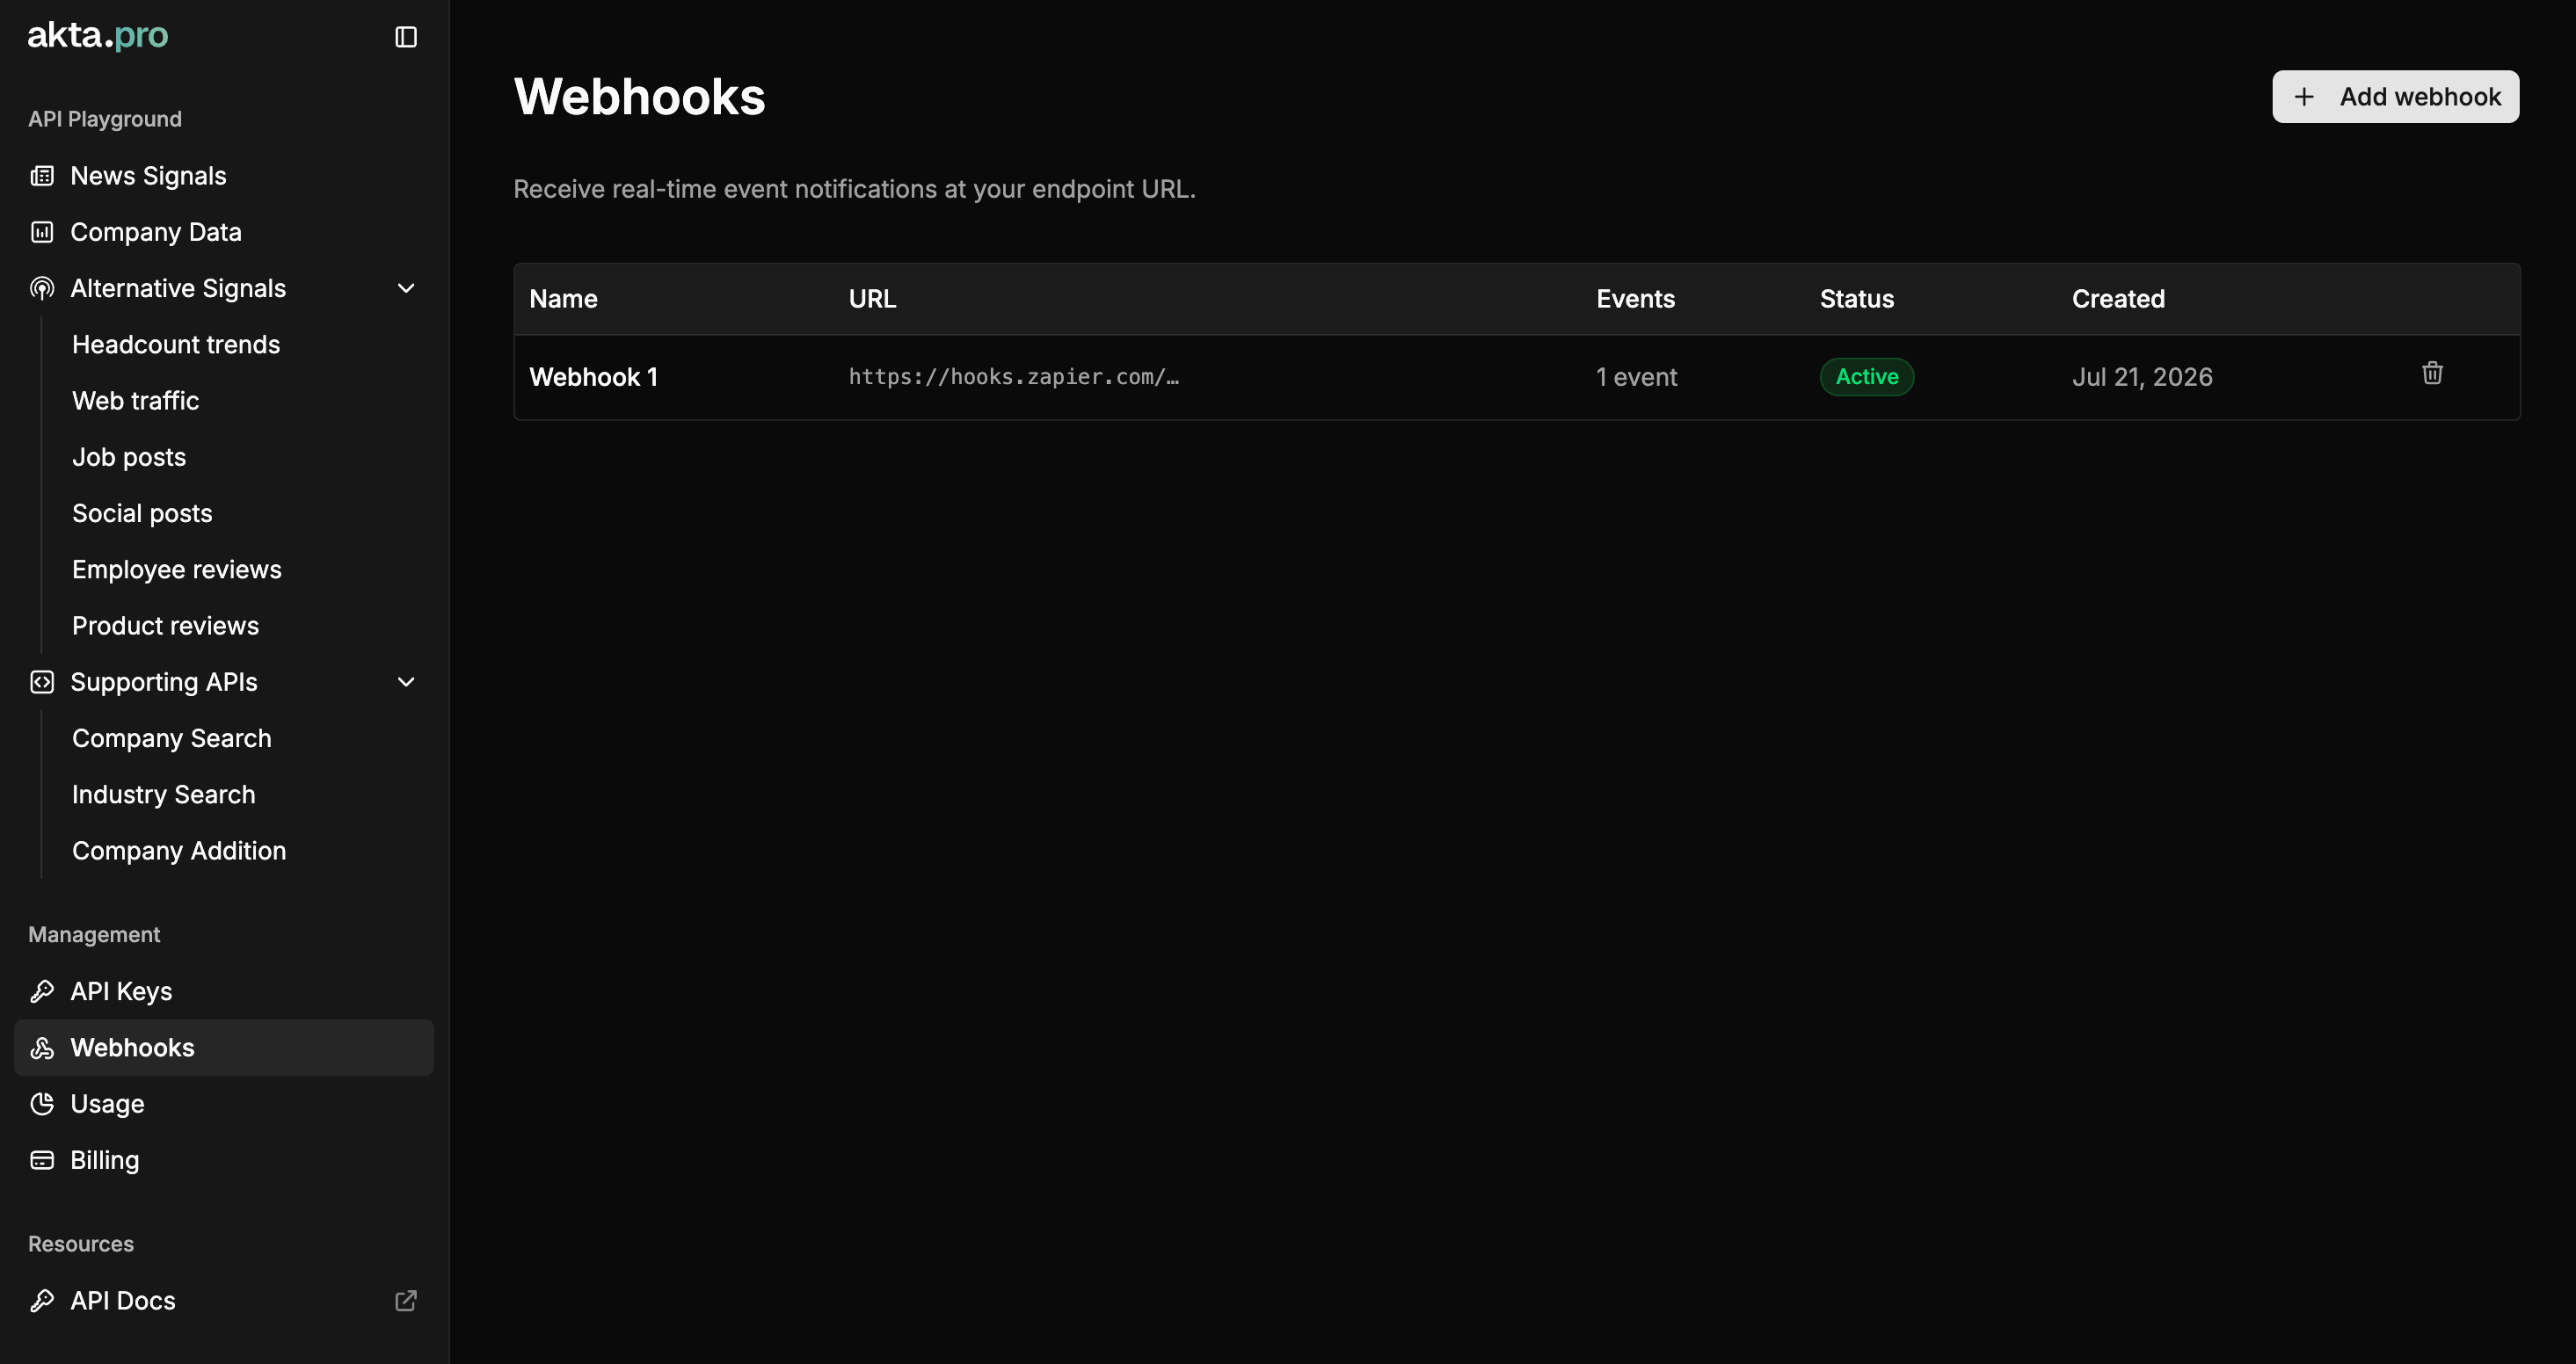 If you already have webhooks configured, you'll see them listed here along with their name, URL, subscribed events, status, and creation date.
## Step 2: Add a New Webhook
Click the **+ Add webhook** button in the top-right corner of the Webhooks page.
This opens the webhook creation flow.
## Step 3: Configure Your Webhook
On the **Configure** step, fill in:
A descriptive name for your webhook, e.g. `Production webhook`. This helps you identify it later in your webhooks list.
The URL that will receive event payloads, e.g. `https://example.com/api/webhook`. This is typically an endpoint on your own server, or a URL provided by an automation tool like Zapier (e.g. `https://hooks.zapier.com/hooks/catch/...`).
If you already have webhooks configured, you'll see them listed here along with their name, URL, subscribed events, status, and creation date.
## Step 2: Add a New Webhook
Click the **+ Add webhook** button in the top-right corner of the Webhooks page.
This opens the webhook creation flow.
## Step 3: Configure Your Webhook
On the **Configure** step, fill in:
A descriptive name for your webhook, e.g. `Production webhook`. This helps you identify it later in your webhooks list.
The URL that will receive event payloads, e.g. `https://example.com/api/webhook`. This is typically an endpoint on your own server, or a URL provided by an automation tool like Zapier (e.g. `https://hooks.zapier.com/hooks/catch/...`).
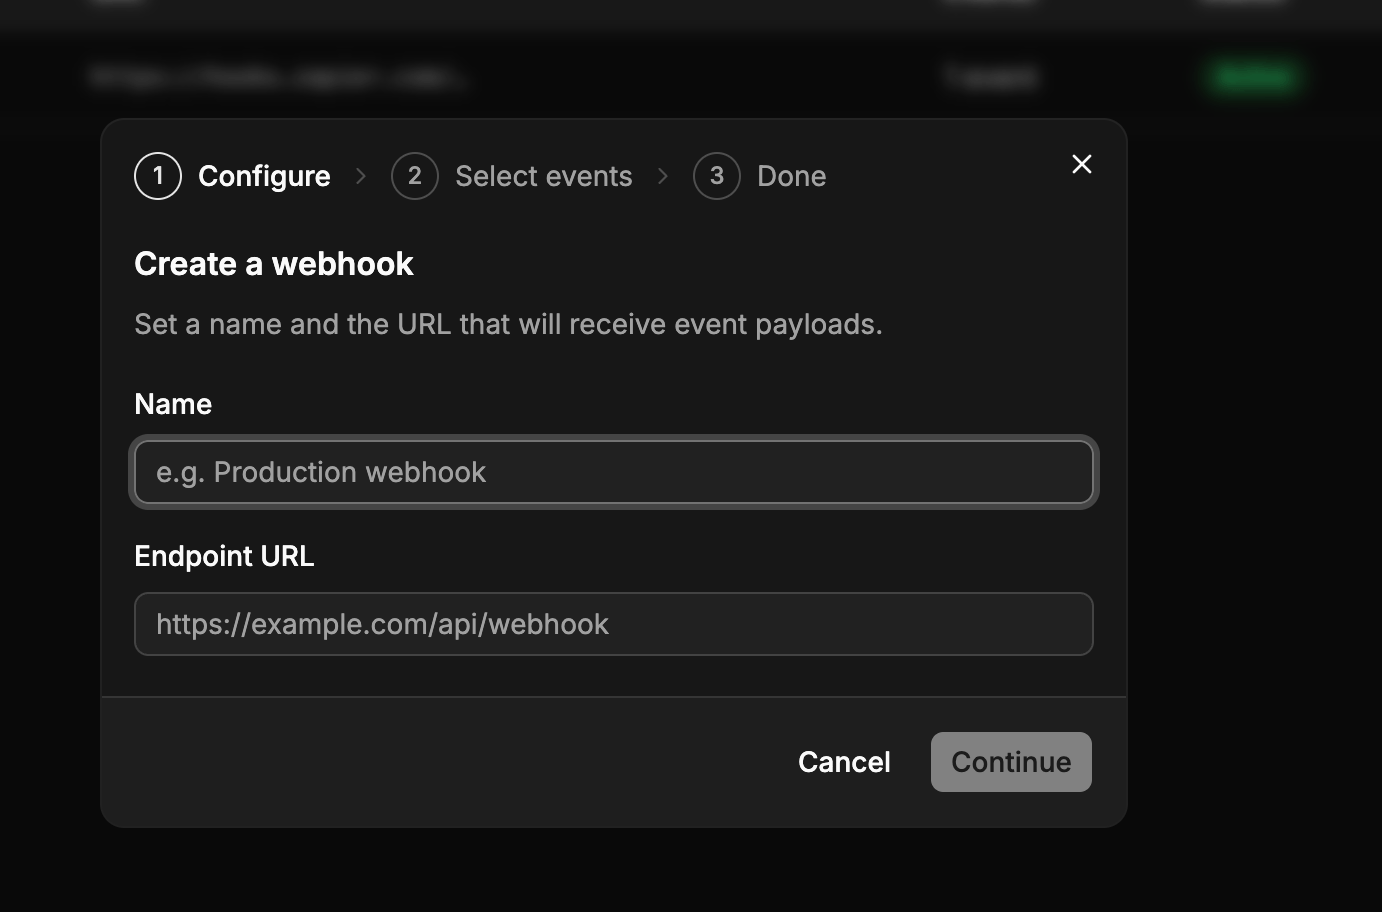 Once both fields are filled in, click **Continue**.
## Step 4: Select Events
On the **Select events** step, choose which events should trigger this webhook.
* Check **Select all** to subscribe to every available event.
* Alternatively, select individual events, such as `company.company_addition`, which fires when a requested company has been added and is available.
The number of events you've selected is displayed below the list (e.g. "1 event selected").
Once both fields are filled in, click **Continue**.
## Step 4: Select Events
On the **Select events** step, choose which events should trigger this webhook.
* Check **Select all** to subscribe to every available event.
* Alternatively, select individual events, such as `company.company_addition`, which fires when a requested company has been added and is available.
The number of events you've selected is displayed below the list (e.g. "1 event selected").
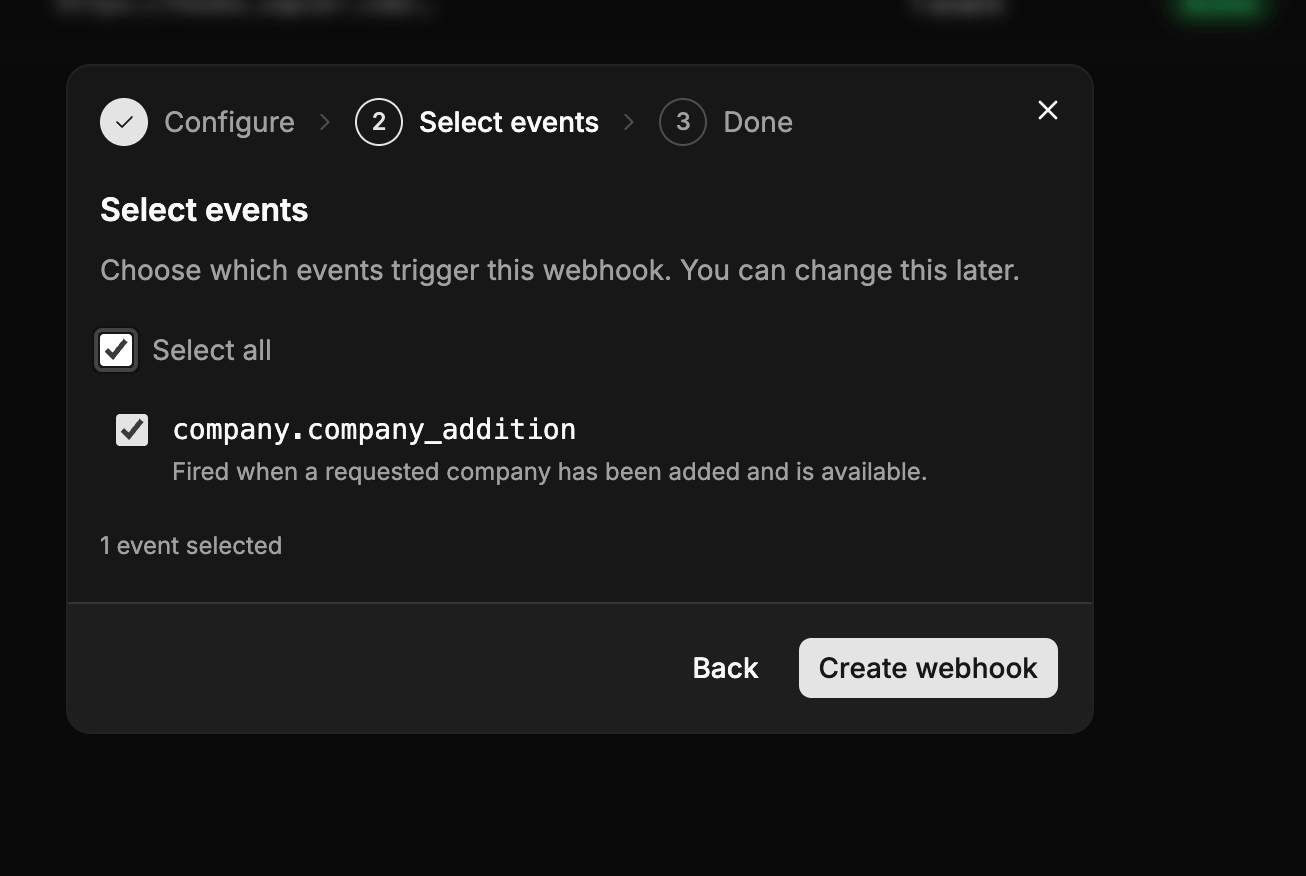 Click **Create webhook** to finish.
## Step 5: Confirm Your Webhook Is Active
After creation, your webhook will appear in the Webhooks table with:
* **Name** — the name you gave it
* **URL** — the endpoint URL (truncated for display)
* **Events** — the number of subscribed events
* **Status** — should show **Active**
* **Created** — the date it was created
Your webhook is now live and will send event payloads to your endpoint URL as subscribed events occur.
## Managing Existing Webhooks
From the Webhooks page, you can:
* View all configured webhooks and their status at a glance
* Delete a webhook using the trash icon at the end of its row
Click **Create webhook** to finish.
## Step 5: Confirm Your Webhook Is Active
After creation, your webhook will appear in the Webhooks table with:
* **Name** — the name you gave it
* **URL** — the endpoint URL (truncated for display)
* **Events** — the number of subscribed events
* **Status** — should show **Active**
* **Created** — the date it was created
Your webhook is now live and will send event payloads to your endpoint URL as subscribed events occur.
## Managing Existing Webhooks
From the Webhooks page, you can:
* View all configured webhooks and their status at a glance
* Delete a webhook using the trash icon at the end of its row